This post follows on from my previous post Tipi Sewing.
We spent almost three weeks over the Xmas holiday period camping in our Tipi. It was pretty much everything I hoped it would be – light, airy, spacious & comfortable.
We camped on my sister’s lifestyle block, as did a number of extended family just for the few days around Xmas. We did end up sleeping in my sisters house two nights – the night we arrived and the night there was torrential rain. The tipi did leak in places in the torrential rain, and there was the odd drip when it rained, but mostly it was fine.

As with any sewing project, I cast my critical eye on it to assess what I would improve next time and then laughed at myself. Why would I ever make another tipi?! So here are my thoughts should any of you ever make one.
- Take your time when measuring to cut the bottom to shape. This comes at the end of the project and I was in a hurry. We spread the whole thing out over the bumpy back lawn and then had kids running over it while trying to measure. I pretty sure one side is quite a bit shorter than the other because of this. Next time I would find a really flat surface, remove all children, and maybe fold the tipi in half or quarters to get a more even cut.
- I really made the door gap a bit too big. I didn’t follow the instructions – I looked at the measurements given and thought they sounded way to small, so went ahead and biggered it.
- I also made the door covering a bit too small. This was twofold. Firstly when calculating how big a tipi I could make I completely forgot to allow for all the other bits (specifically smoke flaps, facings for door and stick seam, and the door covering) and secondly, when I was sewing the door I was in Wellington and the tipi was in New Plymouth all I had to go was the offcuts from the door facing. I was lucky that I did have a bit more fabric than I thought to be able to complete the tipi, but the door covering was put together from four pieces.
- Don’t use selvedge offcuts for the peg loops, they are not strong enough. I thought I was being efficient, but I should have just used the cotton tape.
- I had no idea how many peg loops to put in along the bottom and put one every 30cm or so. We only pegged every second or third one (& still used about 30 pegs), so 50-60cm would be fine. But extra loops around the door area would be helpful.
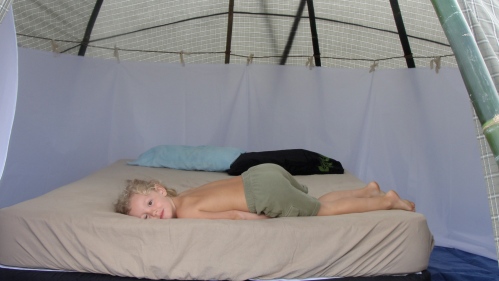
- The lining needed to be higher and have more than one rope & set of ties to hold it up. I used 150cm wide parka nylon cut into panels 1m at the top & 1.5m at the bottom. I only put ties at the seam lines on the bottom, but it needed more ties to make it fit nicely around the bottom of the tipi. 1.5m seemed tall enough when I was making it, but of course, the finished height is a lot less as it is sitting at an angle. My son insisted on photo bombing while I was trying to get pics of the lining!

Unfortunately I don’t have photos of us erecting the tipi. The day we put it up we had about 3 goes to get the poles approximately right. . . and then it still wasn’t quite. It was saggy at the top, though taut at the bottom and so flapped about in the wind, and overall the tipi cover was sitting too low to the ground.
I’m one of those weird people who really enjoy putting up tents. I didn’t feel discouraged that it took several goes – I had been anticipating that it would.
After Xmas we took another afternoon to take it down and try again. This time we lifted up where the poles join quite a bit higher and added in two more poles. The tipi cover ended up sitting quite high above the ground, but apparently that is fine as long as you have a decent liner set up. It was still a tad to high as where the tipi cover sat in relation to where the poles were tied together was a bit low.
For comparison, here is the view looking up at the poles from inside the tent – the first go: 
And the second time round:
And from the outside, can you see the canvas bagging in around the poles?

And then sitting nice and taut:
Here is the “stick seam” – how the edges of the tipi are joined together. Hand sewing the reinforcing around each of the holes for the sticks to go though was one of the most time consuming tasks. I couldn’t figure out how to do them on the machine and I hadn’t budgeted the time to do them, and had to enlist my other half to help sew them. My instructions talked about using sticks (of a particular kind of wood) hand carved to shape. We used quality pine dowel from the local Mitre 10, you can see the bar-code still stuck onto one of the pieces!


And lastly a pic showing how the different parts work together. The tipi cover sits up off the ground, the ground sheet comes close to the edge of the cover, but doesn’t extend beyond it, and the liner tucks in and sits on top of the ground sheet (and is usually held down in some way).

As an update to my costing listed in the last post, we had to go out and buy several sets of pegs, and a couple more small ropes adding another $30-40 to the total. That would bring the total to around $260. However, the time investment was a solid weeks work. . .
I am really pleased with this project. It wasn’t particularly tricky, but it was quite a handful(!) due to the scale of the tipi. It was a really awesome feeling to be able to lie in bed going to sleep and think “I made this shelter for my family”.
 One of my projects this year has been to sew a tipi. No, not a play one, a big one for our family to camp in. I initially bought 10m of canvas for $1 per metre at the Fabric Warehouse pop-up shop in October ’13. Once the idea of a tipi came up I went back to them in January ’14 to see if they had any more of it. They did! And they were happy to sell me the rest of the roll at the same price and I ended up with just over 40m in total.
A tipi cover is basically a ginormous semicircle made of pieced together lengths of fabric. I used the tipi calculator (listed below in resources) it calculate the largest tipi I could make with my fabric, and came up with 4.65m which is both the radius of the cover and approximate diameter of the base of the tipi. Plenty big enough for a family of 4. And with a height of 4m in the middle, more than enough room for my other half to be able to stand up in (due to his height, not really do-able even in a standard family tent).
I decided to use the beautiful Singer 201K that I had been gifted by another sewing blogger. She wasn’t sure if it worked when she gave it to me, so I was really happy to find it worked perfectly when I finally got up the courage to give it a go. I preferred to use the singer as it is much more heavy duty than my little modern machine (I want to say something about how it is gear driven, but I don’t really know what I’m talking about, so I won’t). Four layers of canvas were no problem for it. I did need a bit of a run up when I got up to eight or twelve layers, but as long as I could get the needle into the fabric, it stitched beautifully.
Also, do you like my improvised cone stand? Industrial thread needs to come straight up off the cone, like overlocker thread, so you need some kind of stand when using it on a domestic machine. The teapot is one the children use for play.
Flat felling canvas without pin holes for the rain to come through. . .
So one of the things I had to think about for a while was how to sew a flat felled seam without putting pin holes in the canvas. I also wanted to sew it in such a way that each seam went through several layers of fabric. I was worried that the more usual method of flat felling (sewing two layers together then opening the layers & folding the seam allowance over itself and sewing down) would cause leaking at the point where the seam only went through two layers. I’m sure there are industrial machines that just do this for you, but I don’t have one of those. Here is the technique I came up with:
- Lap top piece over under piece by x (I lined up the two blue stripes on my fabric)

- Sew basting seam down the middle of this join. (I also pinned down the sewing line as I went as the fabric wanted to slip)

- Trim each edge to x (I aimed for 5mm, but cut by eye rather than measuring so it was a bit wonky in places)

- Fold each side over the trimmed edge to create flat fell


- Sew a double row of stitching, one from each side close to the folded over edge.


Costing
Here is the breakdown of what it cost so far (bearing in mind I got the canvas ridiculously cheap)
- Canvas (40m at $1/m) $40
- Nylbond industrial thread (4500m reel) $30
- Heavy duty machine needle $7
- Manilla rope (14m of 12mm rope & 10m of 6mm) $45
- A roll of cotton tape $14
- Parka nylon for lining (15m at $6/m) $90
- Total $226
Resources
The Tipi page at SimplyDifferently
It has basic information on putting together a tipi and has a handy tipi calculator (you need to scroll down from the top); plug in how wide your fabric is and how big you want your tipi and it will calculate the total length required plus the length of each strip to sew together as well as the number of poles you would need at that size (all in metric, too).
The “How to make a Tipi” article from Mother Earth News (originally published 1970).
I printed out and used this article extensively while sewing my tipi together, it has detailed instructions on all flaps, tabs and ties required. Sadly for me it is all in imperial measurements.
Instruction for setting up a tipi from Nomadics Tipi Makers
This has excellent photos and instructions on raising your tipi as well as making it liveable once erected. I’ve got this printed out in a folder ready for when we put the tipi up. I also used their method of making a door covering.
The tipi takes over the dining room
This is a pic of great swathes of fabric I was dealing with by the time I got to sewing the last lane on.

I sewed the tipi cover over August, September & October. On labour weekend (late October) we took it up to my sister’s to try it out. Unfortunately the weather didn’t co-operate that weekend, so we haven’t actually erected it yet. We will be camping there over the Christmas break though, so I’ll get lots of photos and let you know how we got on in our tipi early next year.
Welcome, welcome come on in, you are up to about the 20th stop on our tour. Can I get you a cup of tea? No? Oh well, maybe next time.
If you have jumped in at the middle you can start the tour here at Gemma’s blog, the mastermind of the WSBN sewing room tour. Or you can travel back to yesterday to see Joy’s post or forward to tomorrow to see Jen’s
My sewing space
Fun fact about my sewing space; I can sit in the middle of the room and reach out and touch each of the four walls from my chair. Literally. I tried it the other night. We have a four bedroom house and, as the boys share a bedroom, another larger spare room. But I like that room as a guest room and eventually one of the boys will want it. Although the window is south facing (that’s the not-sunny-side for those of you in the Northern hemisphere), it came painted a light sunny yellow and doesn’t get too dark.
The thing about my sewing space is that as well as being my sewing room, it is also my meditation/quiet space and the we-have-small-children-quick!-hide-all-the-things child free place.
I did not intend to tidy my sewing room when signing up for the blog tour but we are having an international student stay with us for a few months and so I need to fit a portacot in for the little lad I look after as it would normally be in the spare room. Remember how I mentioned this room is also a dumping ground for anything not child friendly? Yeah, major tidy up required! So now I have one clear wall for the portacot to go and everything else can be stored out of reach.
Here we are in the doorway. You can see my gigantic desk and the two sets of rolling drawers with all my notions in them.

And here is the “clear wall”. The box is stuff to be gifted or discarded, seeds and seed raising containers to be used ASAP, and that lovely big mirror I got for $7 at an op shop and haven’t decided where to put it yet.

And looking from the other corner of the room, which is not well framed as I was trying to hold the camera in the very corner of the room. The old writing desk is full of stationary and related items, not sewing stuff. The thing hanging on the ironing board is an old woollen cot blanket and a sheet, to use on top of my crappy ironing board cover.

Here are my lovely machines posing side by side. They are both recent acquisitions, replacing the sewing machine I inherited from my great-grandmother shortly after I left home and the over-locker I got for my 21st. Hmm, actually my over-locker is four years old – but it still *feels* recent. Don’t worry the machine from my great-grandmother was not of fabulous old vintage, but an 80’s Brother, and in any case has only headed off to live with my sister.

An even more recent acquisition is the lovely Singer 201k of 1954 vintage. This was a gift of the “I don’t need it would anyone like it?” variety and I am rather glad I put my hand up for it. I daren’t even place the Singer on my desk, I don’t want the brackets holding up my desk to pull out of the wall. I need to set up on the dining room table to use it. The green thing is my snap press, originally purchased for nappy making but has uses untold (and applications unnumbered). I’ve seen the same press being sold as a grommet press, so at some point I will be able to buy just the die to go in the press and be able to do grommets too.

What I’m working on & next project in line
I’m just going to combine these two as I work on multiple projects at once. Anything that is actually in my sewing room I consider in progress, even if that progress is very slow.
So, in the bins on the shelf I have
- The underwear bin which has several different under wear patterns, and one of each cut out and partially sewn. I’ve been experimenting with matching undies to my (me-made) bras and how to incorporate lace of varying stretch. Also includes my patterns fabric for pads/panty liners.
- The Tia dress. I bought the craftsy class as it was on sale and included the pattern, and I had been eyeing it up for a while. I’ve traced the pattern onto vilene, but still need to alt
 er one piece for the FBA. I’ve got an old cot sheet in there ready to cut up and make a test run. The fabric I’m going to use was originally purchased for the Butterick walk-away dress, but I think the Tia will be easier to fit and more likely to flatter my figure.
 - The start of my steampunk costume. The skirt from Simplicity pattern 1819 is mostly cut out, I just need to cut the lining. I also have a men’s vest pattern to cut out for my beloved.
- My Muse Jenna Cardi’s. There are three currently, two plain black ones (different sleeve & body lengths) cut out ready to sew, and a brown sparkly one almost completed.
- A shark bag I want to make for my nephews birthday. The internets gave me a free pattern and he loves sharks. I’m just at the assembling notions and deciding on fabric stage. . . with just a month to go till his birthday. Eeekkk!
- Mending and a few small projects.
- UFO’s that I’m not sure what to do with yet (finish, re-purpose or discard).


And not it a bin because it won’t fit, all that beige check you see on my desk, is forty odd metres of lightweight ca nvas which I am sewing up to make a tipi. I’m using the lovely Singer to sew it – it sews through canvas like butter. I’ve sewn together 4 of the 5 lengths of canvas, and will sew the edge finishing bits – door, fastenings etc – to the last piece before I attach it to the rest. I think I’m 1/3 to 1/2 of the way there.
Show off your stash
When we first moved into our house, I tried out putting my fabric storage unit in my sewing room, but it just overwhelmed the tiny little room. So first it got moved to the guest room, and then got moved to downstairs to make way for spare beds and the portacot. Our downstairs is more like a basement as there is no internal access to it. The previous owners did start converting it into a liveable space so it is lined, painted, has surround sound wiring, a built in wardrobe and a space for a bathroom to go. That bathroom space currently houses a small freezer and my storage unit with all my fabric. The storage unit was until recently half costuming and the fabric had spilled over into the wardrobe. I just re-organised and put all the fabric together and put all the costuming in the wardrobe (it is mostly belly dance costuming).
A brief word about my fabric storage unit. I was working for Barker & Pollack when they went into liquidation in the late 90’s (? can’t remember exactly when) and this was one of the units that patterns were stored in, my manager kindly let me have it for probably nothing much. When I lived in a bedsit, this was my wardrobe which is why I put a curtain rail and curtain on it.
It was kind of hard to photograph this space, there is just standing space in front of the storage unit! This space also comes with random building supplies left by the previous owners of the house.

I tend to buy quantity rather than quality, so that light blue panne velvet you can see? I have about 20m of it and pretty much just because it was being sold for $2/m.

Before the big rearrange I had fabric stored in nappy boxes and in plastic bags on the floor. The nappy boxes are empty now. Yay! I have a couple of old UFO’s stored here too. Ones that I actually want to finish one day – the other kind get biffed; a stuffed companion cube seat and a faux fur cow print winter coat.

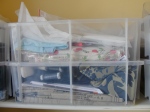
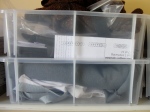
My pattern stash only takes up one drawer. I’ve been a bit ruthless with it recently, and also have the intention of moving towards more customised fitting and altering so I only need a few basics and all the costuming/unusual patterns. Here you can see the fabric I have on rolls, usually covered to protect from the sun. The blue and gold roll is furnishing fabric which I got ridiculously cheap on sale. I took the whole roll of 18m and it is 3m wide!! I love it, but will probably never see the end of it, I could make several costumes, re-curtain half the house and I would still have some left. . .

Favourite thing I’ve made
This was pretty hard to decide, so I picked a recent make of which I happen to have photos. My flutterby dress made last summer, worn here at my cousins wedding. The bodice is made from Simplicity 1882 (amazing fit) with a full circle skirt attached. I’m wearing a light nylon three tier ruffled petticoat I made to go underneath it. I actually made a muslin and fitted it, there is a first time for everything!


View of Wellington
People have posted some lovely pics of Wellington, I am going to leave you with the view from my lounge window. I work from home and this is what I see all day, and it generally makes me pretty happy. All the green!

 My lovely and talented friend Kat has just launched the first pattern of Muse Patterns, the Jenna Cardi.
Over the last couple of years I have occasionally eyed up various knits and considered making my own cardigans, but I hadn’t come across a suitable pattern or anything I really liked, so I’m really glad this was the first pattern Kat released. It fills a gap in my me-made wardrobe, and as I really like the styling and how easy it is to make I have another two or three in the works.
For some reasons all the cardigans I currently have in my wardrobe are blue and I’m getting really sick of them. But, umm, yeah, this one is blue too. But not really ’cause it is turquoise and all the others are navy!
So, onto my first make. The pattern has two different front variations, but I am completely taken with the “B” variation which has a shoulder yoke and little gathers. Nicely showcased in the larger photo – pity about the facing of my dress popping up, I really must sew that down one day.
I wasn’t sure what size to pick as my bust falls into the 46″ size and my waist and hips are in the next size bracket down. I made up the 46″ and it is a bit big for me. However I didn’t take it in at the size check step during construction as I wanted to make it up exactly as per the pattern, and although my next one is cut out in the 44″ size I’m quite happy with this one as a relaxed fit cardi. In the photos I am wearing it over a dress with 3/4 length fullish sleeves.
M y fabric is a merino/modal mix from the Levana factory shop in Levin. My mother and I took my Nana there to get the fabric to make her a capsule wardrobe for their upcoming overseas holiday. I’m not quite sure how it happened, but for some of the garments we made we had bought way too much fabric, so even after making a longline cardigan for my Nana, there was enough of this fabric left for me to make a garment too. Sadly I couldn’t *quite* get the long sleeve version out of the offcut, so chose the 3/4 sleeve.
The only beef I have with this fabric is how slippery slidey and wriggly it was to cut out & sew. I could not have sewn the top stitching in the garment without a walking foot. Now that it is made, I love how soft and snuggly the fabric feels.
Even though it is too big, you can see the curve of the shaping in the side seams here. Muse patterns are designed for an hourglass figure and that’s me. Yay! Hmm, you can also see there is some odd spacing going on with the buttons. My automatic button hole “feature” was playing up, and really made me wish for a manual over-ride on my machine.

Earlier last year, while sewing curtains in fact, I had a wee brain wave about my sewing space. Since we moved into our new house (2 years ago!) I have had my very own sewing room. Previous to this I had sewn in our lounge, and the lovely little second hand “Horn Lifter” table that we found at an op shop was great for this. The Horn sewing tables are great, they close up really neatly and then fold open with all your supplies inside. However, my one had lost one of the opening out arms and I was smooched up against the wall. And I was trying to use my overlocker on the same little table as my sewing machine.

See? Not so good for sewing big things. . .

I found a much bigger table on trademe. It mounts to the wall on brackets, I liked the idea as I have put all my notions in a wheeled filing cabinet which I can move around as needed. Unfortunately I didn’t take into consideration the reverberations of the machines and my temporary fix is an extendable rod underneath the machines bracing between the desk and floor. The table also came with a “kickboard” which I used as a shelf above my table.


Since I took these photos I have got a new machine, a Janome DC2050, and added clear plastic bins to the shelf up top for easy viewing of works in progress.
WSBN (Wellington Sewing Bloggers Network) did a cake sew-along for the month of July. Cake patterns that is.
And then we all got together for high tea to eat cake while wearing our cake patterns.
The amazing selection of cake:

The talented ladies of the WSBN (there are so many of us!):

Details of my make
I was tempted to buy the Tiramisu pattern when it was first released (it was the first pattern put out) I think I didn’t end up buying at the time as I was pregnant and didn’t know if I would have any sewing time after baby arrived.
Sizing: Cake patterns have a special way of doing sizing to cater to variously proportioned bodies. I cut my pieces out with a 40″ back, bodice front in 45C (gathered onto 40″ waistband), 37.5″ waist/skirt, and the skirt length cut down to 50″ markings.
Fabric: Firm, not very stretchy knit (poly) $5/m but I had purchased 4m.
My reasoning when like this. . . Reading the envelope “Hmm, I need 2.7 for my size, but I will probably need to lengthen it so I’ll get 3m”. At the fabric store “I needed 3.something? I had better get 4m!”
What I like about this pattern
- I love that the stretch on the front bodice is diagonal, it works to make the bodice fit really well. It means it works for me whether I am wearing a bra or not (a new requirement for my sewing!).
- I can easily breastfeed in this dress. If a were to make this in such a firm knit again, I would cut the neck binding along the stretch rather than across it, and maybe add in elastic into the binding. But that may not be necessary in a softer knit.
- Pockets! Need I say more?
- Comfort and ease of wear. I think this pattern may convert me to being more of a dress wearer. I *aspire* to wear dresses, but find myself consistently reaching for pants and tops in the mornings. I spend all day getting up and down off the floor (to play with babies) and the skirt is full enough to still be modest when sitting cross legged.
What needs changing (to fit me)
I couldn’t find anywhere on the pattern or website what height this pattern is designed for, and there weren’t any lengthen lines on the pattern. This is one of the reasons I used the 45 piece on the front instead of doing an FBA on the size 40 (the other reason might be because I’m lazy and this was a simple option!). I also cut the skirt pieces down to the 50 markings so I had plenty of length to work with. I did end up trimming quite a bit off the hem, but mostly at the front, so I would probably take the length to the 45 line next time. I also think a smidge more width in the waist band would not go amiss.
The sleeves bind my arms a bit when reaching up. I think this is a combination of the lack of give in my fabric, and where the sleeve ends up sitting due to my wide shoulders. When sewing up the shoulder seam, I trimmed off the extra length of the shoulder seam in the front 45″ pieces so they matched the back 40″ piece. Next time I will extend the back shoulder seam when I cut it out to the length of the 45″ piece – a very simple wide shoulder adjustment!


It’s school holidays and my Mum, my sister and her family came to stay with us last weekend and for Monday & Tuesday. So we had four energetic little boys in the house and we were stuck inside most of the time due to the horrid weather. Luckily we had 5 adults, lots of craft supplies and plenty of play room.
My tax refund came through while they were here and we went along to Wellington Sewing Services in Kilburnie to investigate buying an new sewing machine for me. I’ve been wanting to get a new machine for a month or two now, and was all prepared to save up and wait for 6 months or so, but when I got the tax refund letter I immediately knew what it needed to be spent on (luckily my other half didn’t disagree). I decided on the Janome DC2050 and I now have a matched set as my overlocker is a Janome too (the MyLock 744D).
My brother-in-law has a similar figure to my other half and he admired the navy hoodie I made Mr R recently. I thought my brother-in-law was well adapted to the cold, as he often puts on just another t-shirt when the rest of us a reaching for jerseys and cardigans. Turns out it is also partly due to difficulty in finding well fitting warm tops. We decided to make Mr D a hoodie too and raced off to The Fabric Warehouse where we found this nice dark grey sweatshirting and I already had a suitable zip from the fabulous Petes Emporium.
 This project was a collaborative one with my sister, as she has decided to learn to sew. I traced off a copy of the pattern with appropriate alterations so she could take it home and she did most of the cutting out and pinning pieces together. I ended up doing all the driving of the sewing machines, mostly because I wanted to use my new machine.
Details
Pattern: McCalls 6614, view D, size M
Fabric:
Dark grey polycotton sweatshirting 2m @ $15/m
Grey ribbing 0.7m @ $8/m
Notions: Open ended zip $2.50
Cut & Sewn: 13th – 16th July
Alterations made:
6cm length added to the body,
5cm to the sleeves &
2cm to the hood
Zip taken 11cm up into the hood
The neck line of this top is quite wide, and Mr D thought it would be cool to take the zip up into the hood so he could zip it up to his chin. It did require a slightly different order of construction and my sister was left with the job of hand sewing the hood lining down after they went home. It does look very cosy zipped up!

I’ve been struggling for sewing time recently. I felt really productive in the first part of the year, but since May my two littlies have stopped napping at the same time. In June, I started providing inhome childcare to another little one 3 days a week, further cutting down on sewing time (oh, but hey, I’m earning money :-)).
I had grand plans of making a beautiful vintage style coat this winter, I have both the fabric and the pattern and have even made a muslin. I had hoped to cut it out when we had a social sewing afternoon at Made on Marion a few weeks back (June 23rd to be precise). Sadly I realised that there is no way I would have time to complete a coat this winter and I’ve deferred it to next winter. So I took along my mending pile (not so big) and one pocket nappy to sew up.
Back in early 2011 I did a huge bulk sewing mission and made 16 of these things, so I am puzzled as to why I had a single one left cut out but not sewn. I had intended to take photos to document the process of sewing this together, however I was frustrated with my lack of sewing time and just went ahead and whipped this up.

I drafted this pattern from a borrowed pre-made one, but I don’t remember the brand. This style has fitted my boys from around 6 months and still fits my getting-close-to-3 year old (both tall and slender babies though).

The particular nappy I copied had an opening in the front as well as the back, and I am really glad I included this feature in my nappies, it makes it much less fiddly to get the liners in and out.

All my nappy supplies have come from GreenBeans, and they are great. They are a New Zealand company so postage is good and they have free patterns and lots of helpful information on their site. I think the cost of the nappies worked out at around $5 each, and at the time this kind of nappy in the shop was around $20.
As I mentioned in my previous post about curtains, I am a big fan of them for their insulating properties. Both our front and back doors are mostly glass and a bit drafty, so I want to put curtains over them in winter. After purchasing the last of the roll to make my dining room curtains and kitchen blind, I was pleasantly surprised to find more of it recently, and bought enough for one full length drop to go over our back door (which is at the end of the kitchen along with a laundry alcove, hence the laundry bucket in the picture).

The curtain rail is small and attached just below the ceiling moulding so it won’t be very noticeable in summer if we choose not have a curtain up then.

I was really glad we had this up during the severely stormy weather a couple of weeks ago. There was a strong draft coming through the door (and water blowing in under it) but the curtain stopped it completely.
Opps, you can see the lining is longer than the curtain here; I was waiting to see whether the fabric would drop at all before trimming the lining. The lining doesn’t need hemming, so I will just cut it in situ when I get around to it. . .
Details
Pattern: Burda Magazine, October 2012, number 139
Fabric: 2.5m
Cut: Early May
Sewn: Early – 18th May, and then reworked a week later. . .
Alterations made:
- Took in side & inseams by about 3mm
Successful: No, oh and yes because I have actually been wearing them. I’ve really struggled to write this post as I have been so unenthused about how these pants turned out. I have been wearing them because I love the fabric, but I am careful to wear them with tops as long as I can find to cover the waist/hips/bottom!
 I
I 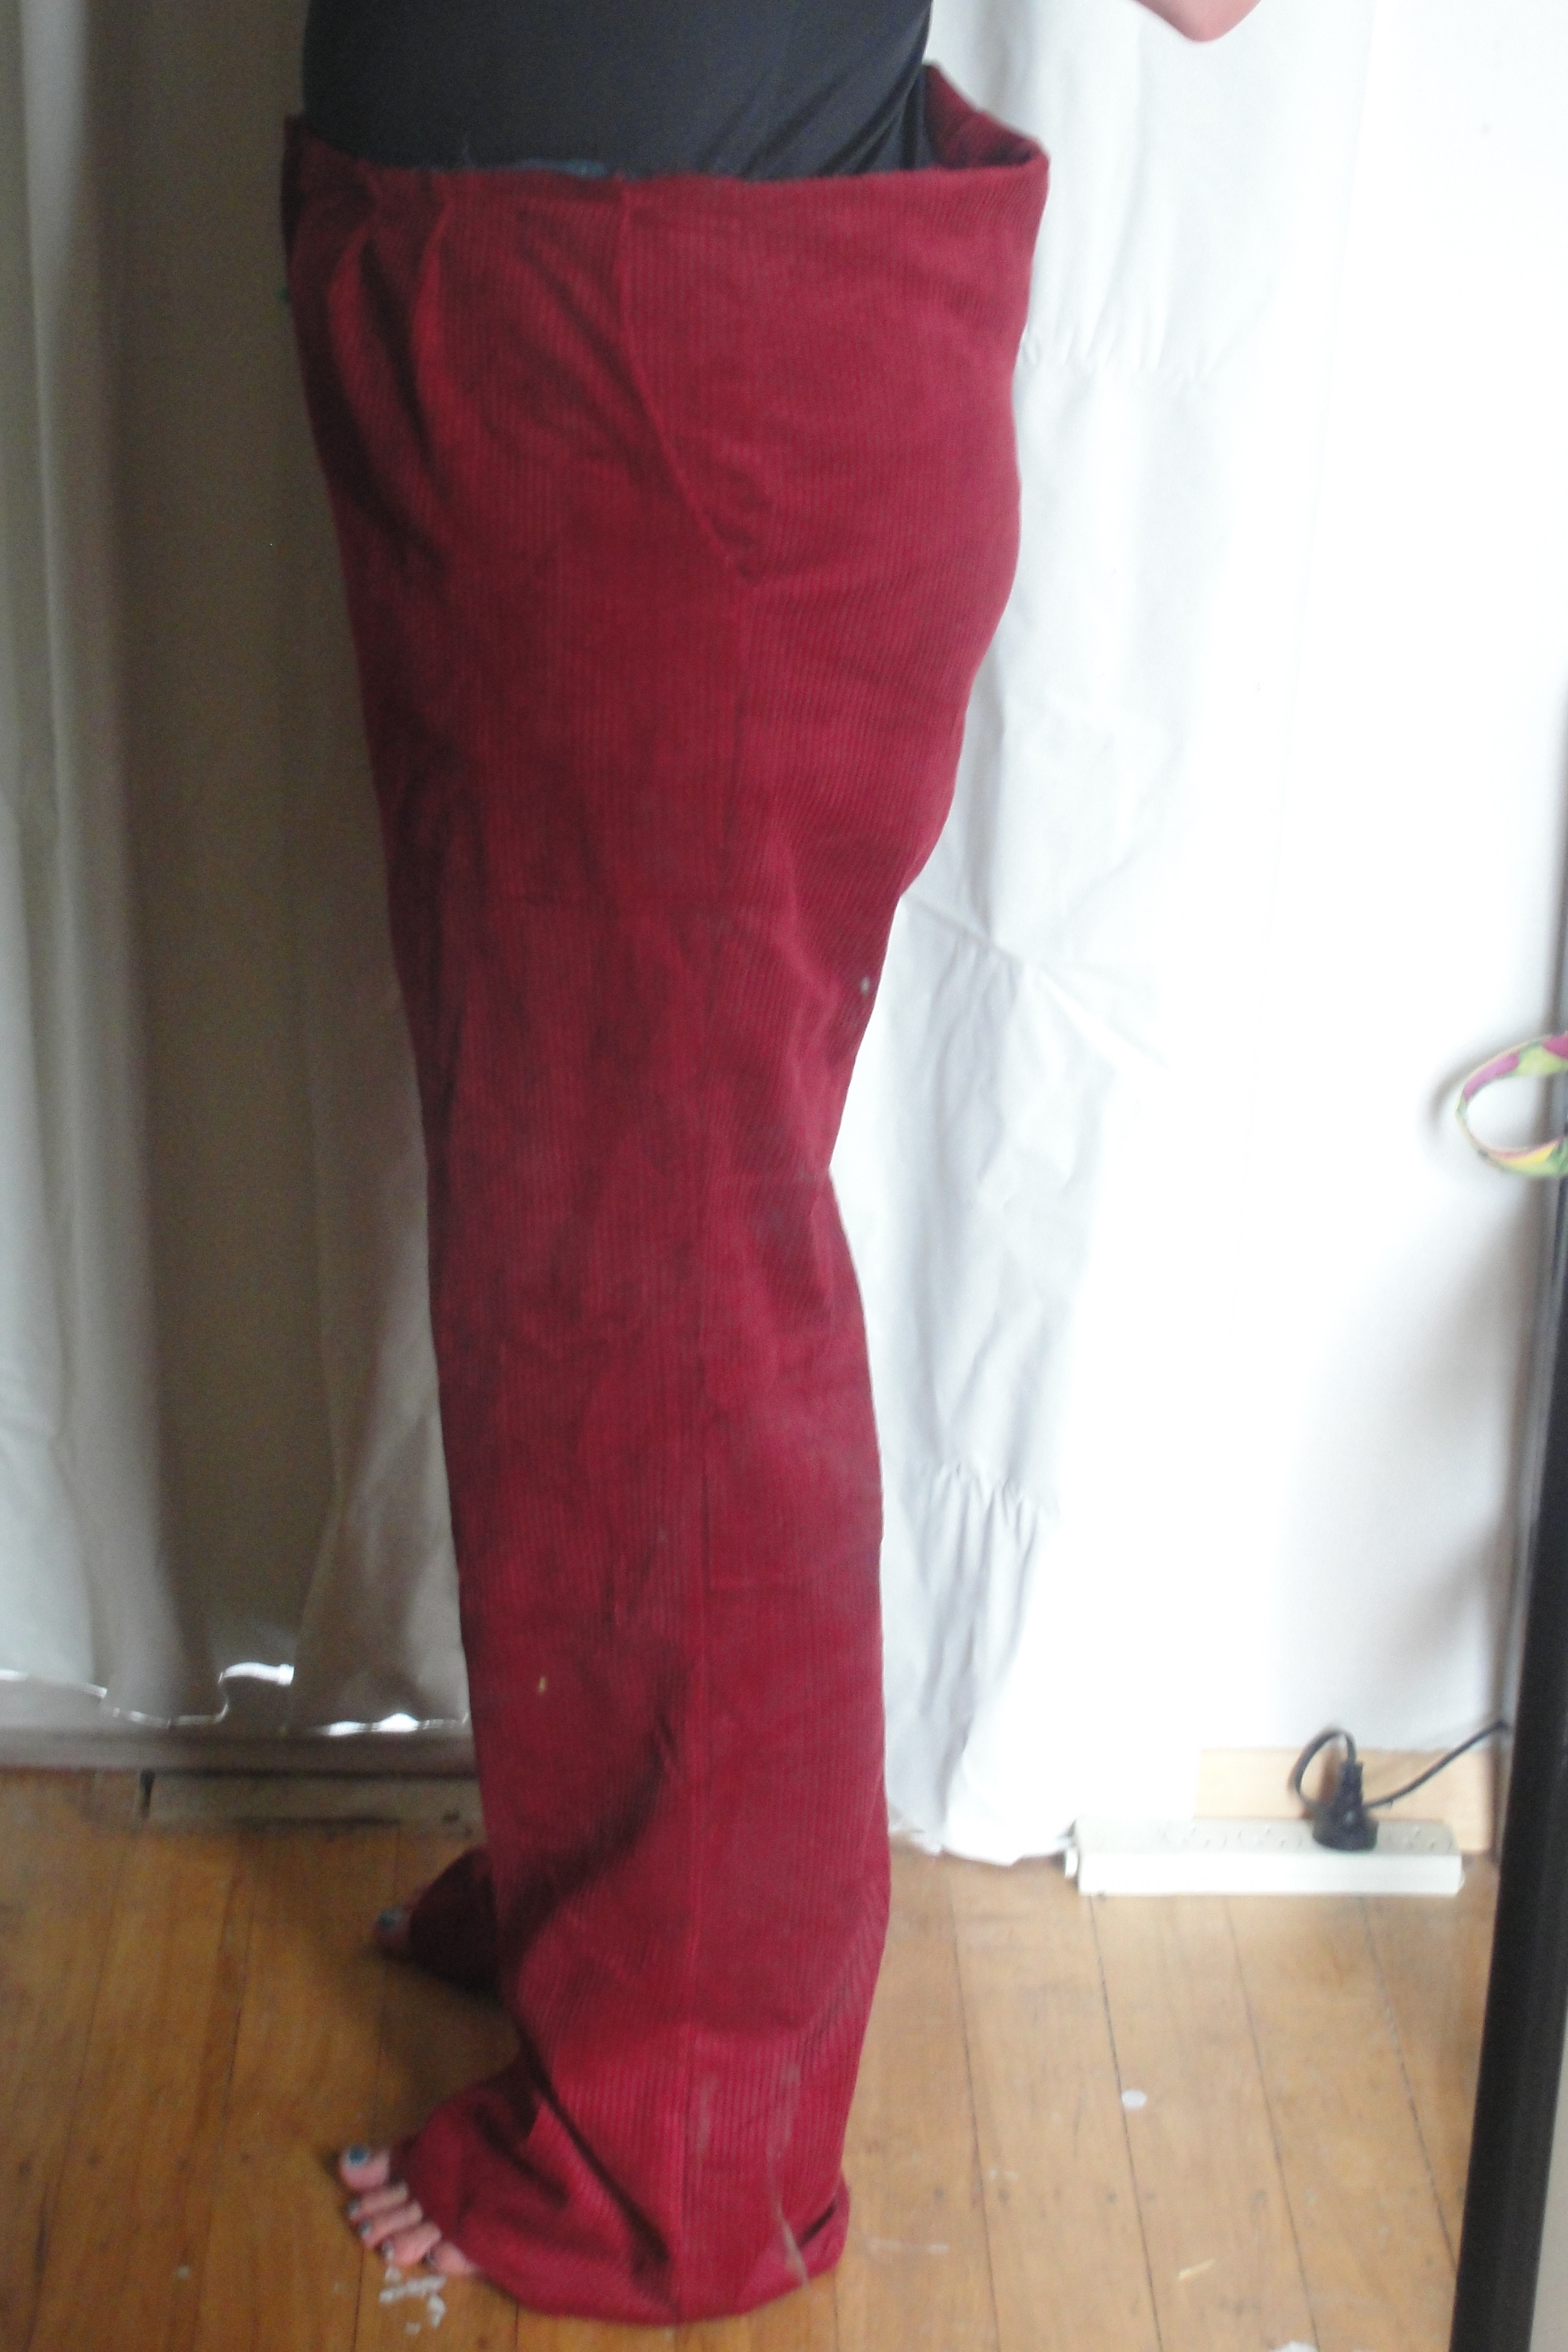 initially basted them together as I was worried about them fitting. Bet they seemed rather on the big side and so I decided to take in the side seams a little when sewing them properly.
You can tell from the basting pictures that the front pleats are not a great look on me – or the cord. I wish as this stage I had drafted them out or turned them into darts, but instead I opted just to sew them down. A mistake I’ll learn from, I’ll never make pants with front pleats again!

 There is one small feature of these pants that I do like. I used teal satin to line the pockets and them also to face the hems. It was one thing that made me smile when I was sewing them up.
For your amusement, here is the waistband front & back on the first outing of these pants. The section at the back with the gathers in the waistband was supposed to be elasticated, but I had cut the waistband too short, so I gathered the back into the waistband. I crotch adjustment I had done was obviously wrong so I got the weird bulge in the back.


A day or so later I realised that the pants were overall to long in the crotch and I didn’t like where they were sitting. I cut the waistband off and sewed another on a bit lower. I also cut off the extra fabric making the bulge at the back. This time I added in the elastic.
OK, so now the pants feel better and so I got my partner to take a photo of them for me. But no, sadly they looked even worse from the back than the first photos. **sad, sad face**
So after working on these pants for about a month, and taking over a month to write a post on them, thats about all I want to say. May this chapter of my sewing life be considered over!